Quick Summary
Master the forgotten art of zone focusing to capture sharp street photos without ever touching your focus ring. Learn the techniques that made photography legends and never miss another decisive moment.
Zone Focusing for Street Photography: Master Sharp Photos Without Looking
Zone Focusing for Street Photography: Master Sharp Photos Without Looking
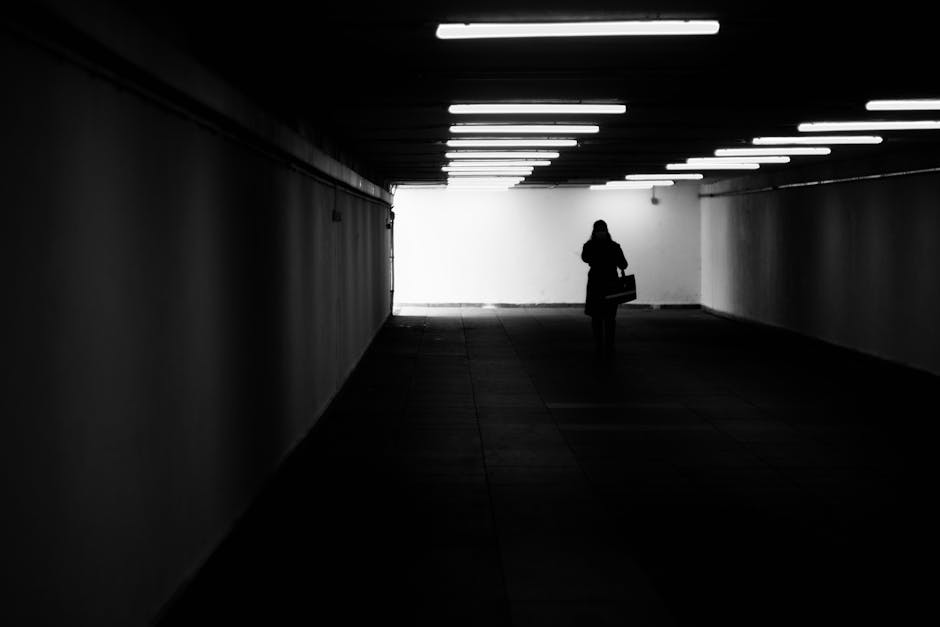
Standing at the corner of Fifth Avenue and 42nd Street, I watched a street vendor juggle oranges while tourists gathered around, cameras clicking frantically. Most photographers fumbled with autofocus, missing the peak moments as their lenses hunted back and forth. Meanwhile, I captured frame after frame of sharp, perfectly exposed images without once looking through my viewfinder or touching a focus ring.
The secret? Zone focusing—a nearly forgotten technique that transforms how you approach street photography. Once you master this method, you'll never miss another decisive moment waiting for autofocus to catch up.
What Is Zone Focusing?
Zone focusing is the practice of setting your lens to a specific focus distance and aperture combination that keeps everything within a certain range acceptably sharp. Instead of focusing on individual subjects, you create a "zone" of sharpness that extends from a near point to infinity, allowing you to shoot quickly without refocusing.
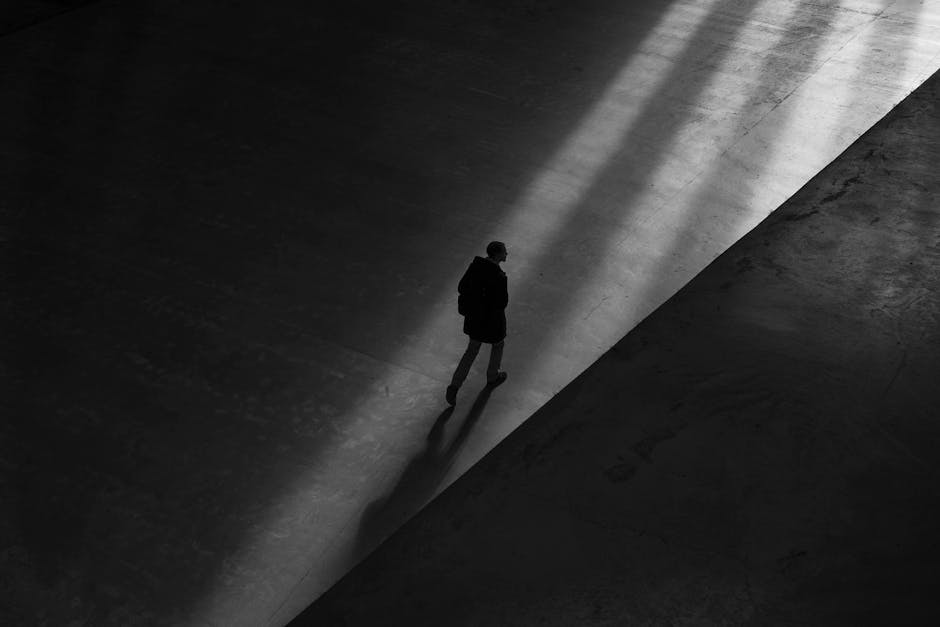
This technique predates autofocus by decades. Street photography legends like Henri Cartier-Bresson, Garry Winogrand, and Joel Meyerowitz relied on zone focusing to capture fleeting moments that would disappear before any focusing system could react. The approach requires understanding depth of field, but once mastered, it's devastatingly effective.
Think of zone focusing as pre-programming your camera for success. You're making technical decisions in advance, freeing your mind to concentrate entirely on composition and timing. It's the difference between hunting for your shot and being ready for it.
The Science Behind Sharp Photos
To master zone focusing, you need to understand depth of field—the range of distances that appear acceptably sharp in your photograph. Three factors control depth of field: aperture (f-stop), focal length, and focus distance.
Smaller apertures (higher f-numbers like f/8, f/11) create deeper depth of field. Longer focal lengths create shallower depth of field. Closer focus distances create shallower depth of field. Zone focusing leverages these relationships to maximize your sharp zone.
The "circle of confusion" determines what appears sharp. This technical measurement varies by camera sensor size, but practically, it means there's wiggle room in what looks acceptably sharp. A slightly out-of-focus element might still appear sharp in your final image, especially at smaller print sizes or screen viewing.
Understanding hyperfocal distance is crucial. This is the closest distance you can focus while keeping objects at infinity acceptably sharp. Focus at the hyperfocal distance with a given aperture, and everything from half that distance to infinity stays sharp. This creates the maximum possible zone of sharpness.
Setting Up Your Zone Focus System
Start with a 35mm lens (full-frame equivalent) at f/8. This combination provides an excellent balance of sharpness zone and light-gathering ability. Set your focus to approximately 10 feet. At f/8, most 35mm lenses will keep everything from about 5 feet to infinity acceptably sharp—perfect for street photography.
Your camera's depth of field markings, if present, show these zones visually. Modern lenses often lack these markings, but smartphone apps can calculate them. Alternatively, test your specific lens by photographing a measuring tape at various distances and apertures to understand its behavior.
Many photographers use the "double the distance" rule as a starting point: if you want everything from 6 feet to infinity sharp, focus at 12 feet. This approximation works well with most 35mm lenses at f/8, though testing your specific equipment provides more precision.
For different focal lengths, adjust accordingly. A 24mm lens allows closer focus distances while maintaining infinity sharpness. A 50mm lens requires slightly more careful calculation but still works excellently for zone focusing. The key is learning your specific lens and camera combination.
Practical Zone Focus Distances
The 10-Foot Standard: Focus at 10 feet with a 35mm lens at f/8. This setup keeps everything from approximately 5 feet to infinity sharp—ideal for most street photography situations. You can photograph people across the street, architectural details, and close subjects without refocusing.
The 6-Foot Close Zone: For more intimate street photography, focus at 6 feet with the same settings. This brings your near limit to about 3 feet, perfect for photographing vendors, street performers, or anyone you're having a conversation with while still maintaining background sharpness.
The Infinity Setup: When photographing primarily distant subjects—crowds, architecture, or wide environmental shots—focus at the hyperfocal distance (usually 12-15 feet for 35mm at f/8). This maximizes your depth of field and ensures everything from about 6 feet to infinity stays perfectly sharp.
The Close Combat Zone: For crowded markets, festivals, or tight spaces, focus at 4 feet with f/8. This keeps everything from 2 feet to about 15 feet sharp—perfect for chaotic environments where subjects appear at varying distances rapidly.
Remember these are starting points. Your specific lens may behave differently, and lighting conditions affect how critically sharp your images need to appear. Test these settings in controlled conditions before relying on them in the field.
Mastering the Technique
Start by practicing in your neighborhood during quiet hours. Set your zone focus and walk around, taking photographs without looking at focus indicators. Force yourself to estimate distances and trust your setup. This builds the spatial awareness essential for street photography success.
Train your eye to judge distances accurately. Most people underestimate distances beyond 15 feet and overestimate distances under 6 feet. Practice by guessing distances, then measuring to check your accuracy. Soon you'll instinctively know what falls within your sharp zone.
Use your zone focusing setup for an entire day without changing it. This constraint forces you to work within the system and understand its capabilities fully. You'll discover situations where it excels and others where adjustments might help.
Practice the physical mechanics until they become automatic. Set your focus and aperture without looking at your camera. Practice zone focusing while walking, while talking to people, while distracted. The goal is making the setup so natural that it requires no conscious thought.
Aperture Selection Strategy
f/8 - The Sweet Spot: Most lenses perform excellently at f/8, balancing sharpness with depth of field. This aperture provides enough depth for zone focusing while maintaining image quality. It's bright enough for handheld shooting in most lighting conditions.
f/11 - Maximum Zone: When you need the deepest possible depth of field, f/11 extends your sharp zone significantly. However, image quality may suffer slightly due to diffraction, and you'll need more light or higher ISO settings.
f/5.6 - Speed Priority: In lower light or when you need faster shutter speeds, f/5.6 still provides workable depth of field with zone focusing. Your sharp zone shrinks, requiring more precise distance estimation, but it's entirely usable.
f/4 and Wider - Selective Use: Wider apertures limit zone focusing effectiveness but can work for specific situations. Use these when you want to isolate subjects while keeping a small zone sharp, or when light is extremely limited.
Consider your camera's sweet spot. Most lenses perform best 1-2 stops down from their maximum aperture. For an f/1.8 lens, f/4 might provide better corner sharpness than f/8, even if the depth of field is shallower.
Zone Focusing in Different Lighting
Bright Daylight: Ideal conditions for zone focusing. Use f/8 or f/11 for maximum depth of field. Fast shutter speeds freeze motion, and abundant light ensures low ISO for maximum image quality. This is perfect learning weather for zone focusing.
Golden Hour: Lower light requires balancing depth of field with proper exposure. f/8 usually works well, but be prepared to raise ISO or accept slightly wider apertures. The beautiful light quality often compensates for any technical compromises.
Overcast Conditions: Flat light provides even illumination perfect for zone focusing. You might need f/5.6 or higher ISO, but the even lighting reduces harsh shadows that could reveal minor focus errors. Great conditions for building confidence.
Night Street Photography: Zone focusing shines in low light because autofocus struggles. Use f/4-f/5.6 for adequate light gathering, accept the reduced depth of field, and focus more carefully. Street lights and neon provide excellent contrast for night zone focusing.
Backlighting: When shooting into bright light, zone focusing prevents autofocus confusion. Your camera won't hunt between the bright background and darker subjects. Set your zone and shoot confidently into dramatic lighting situations.
Advanced Zone Focusing Techniques
The Moving Zone: Instead of fixed distances, adjust your zone focus as situations change. Walking through different environments, quickly reset for close work (markets) versus distant work (plazas). This dynamic approach maximizes zone focusing flexibility.
Multi-Zone Setup: Use different lenses preset to different zones. A 24mm at hyperfocal for wide environmental shots, a 35mm at 10 feet for general work, and a 50mm at 6 feet for closer portraits. Switch lenses instead of changing settings.
Zone Focus with Movement: When following moving subjects, zone focusing excels because the subject moves through your sharp zone. Position yourself where action will occur, set your zone appropriately, and let the story unfold within your depth of field.
Vertical vs. Horizontal Zones: Remember that depth of field appears different in vertical versus horizontal frames. The same settings might feel perfect for horizontal shots but limiting for vertical compositions where foreground/background relationships change.
Group Photography: Zone focusing works excellently for photographing groups of people at varying distances. Set your zone to encompass the entire group, eliminating the need to choose which person to focus on while ensuring everyone appears reasonably sharp.
Common Mistakes and Solutions
Over-relying on Infinity Focus: Many beginners set focus to infinity and assume everything will be sharp. This approach wastes the closest portion of your depth of field. Focus at the hyperfocal distance instead to maximize your sharp zone.
Ignoring Lens Characteristics: Different lenses have different depth of field characteristics, even at the same focal length and aperture. A cheap lens might not perform as well at f/8 as a professional lens. Test your specific equipment rather than relying on general guidelines.
Forgetting About Subject Movement: Zone focusing assumes relatively stationary subjects. Fast-moving subjects might blur due to motion, not focus errors. Consider shutter speed as part of your zone focusing strategy.
Neglecting Viewfinder Confirmation: While zone focusing eliminates constant focusing, occasionally check your viewfinder or LCD to confirm everything looks right. Modern cameras can help verify your zone focus accuracy.
Aperture Fixation: Don't become so committed to one aperture that you miss better opportunities. If the light changes dramatically, adjust your aperture and recalculate your zone rather than fighting poor exposure.
Zone Focus for Different Cameras
Full Frame Cameras: More challenging for zone focusing due to shallower depth of field at equivalent focal lengths. Use smaller apertures (f/8-f/11) and consider slightly wider lenses (28-35mm) for maximum effectiveness.
APS-C Sensors: Excellent for zone focusing because the crop factor increases apparent depth of field. A 24mm lens behaves like a 36mm but with deeper depth characteristics, making zone focusing more forgiving.
Mirrorless Cameras: Perfect for zone focusing because electronic viewfinders can show depth of field preview in real time. Many mirrorless cameras also have excellent manual focus aids that help set up your zone focus precisely.
Film Cameras: The original zone focus cameras. Most film cameras have distance scales and depth of field markings that make zone focusing intuitive. If you're learning zone focusing, an old film camera with marked lens might be the best teacher.
Phone Cameras: Modern smartphones often use computational photography that mimics deep depth of field. While not true zone focusing, understanding the principles helps you use smartphone cameras more effectively for street photography.
Building Muscle Memory
Practice setting your zone focus in the dark. Learn to find your focus ring and aperture control by feel. This muscle memory proves invaluable when shooting in challenging conditions or when you need to adjust settings without taking your eye off the action.
Time yourself setting up zone focus. Initially, it might take 30 seconds or more. With practice, you should achieve your setup in under 5 seconds. Fast setup means you can adapt quickly as shooting conditions change.
Practice with different lenses if you own multiple focal lengths. Each lens feels different and has different travel distances for focus rings. Building familiarity with all your equipment makes you more versatile in the field.
Develop pre-visualization skills. Before raising your camera, look at a scene and estimate what distance to focus at for optimal coverage. This planning approach reduces setup time and increases your success rate.
Zone Focusing Workflow
Morning Setup: Before leaving home, decide on your primary lens and set your basic zone focus for anticipated shooting conditions. Having a default setup ready eliminates decision fatigue later.
Location Assessment: Arriving at a new location, quickly assess typical subject distances. Are you photographing across busy streets (long distances) or in tight alleyways (close distances)? Adjust your zone accordingly.
Light Evaluation: Check available light and adjust aperture if necessary. Bright conditions allow smaller apertures and deeper zones. Dimmer light might require wider apertures and more precise distance estimation.
Position Selection: Choose shooting positions that complement your zone focus setup. If you're set for 6-15 feet, position yourself where subjects naturally fall within that range.
Continuous Adjustment: As conditions change throughout the day, readjust your zone focus. Don't stubbornly stick with morning settings if afternoon conditions call for different parameters.
When NOT to Use Zone Focusing
Portrait Photography: When making portraits where eye sharpness is critical, precise autofocus usually outperforms zone focusing. The shallow depth of field required for portrait aesthetics conflicts with zone focusing principles.
Telephoto Work: Long lenses have naturally shallow depth of field that makes zone focusing less practical. While possible, the precision required often makes autofocus more reliable for telephoto street photography.
Macro Details: Extremely close work requires precision that zone focusing can't provide. For photographing street art details, architectural textures, or other close subjects, accurate autofocus serves you better.
Low Light Precision: While zone focusing works in low light, very dark conditions might require precise focus on specific elements that zone focusing can't guarantee. Use zone focusing for general low light work, not critical precision shots.
Fast Action Sports: Rapidly moving subjects often require continuous autofocus tracking. Zone focusing works for relatively predictable movement but struggles with erratic, high-speed action.
The Mental Game
Zone focusing changes how you see. Instead of hunting for perfect focus on individual elements, you begin seeing entire scenes as photographic opportunities. This shift in perspective often leads to more dynamic, layered compositions.
Trust your setup completely. Doubt leads to unnecessary adjustments that waste crucial moments. Once you've tested your zone focus extensively, commit to it fully. The confidence shows in your photography.
Embrace constraints as creative fuel. Limited depth of field forces you to consider compositions more carefully. Working within your zone focus parameters often leads to more thoughtful photography than unlimited autofocus flexibility.
Develop patience for the right moments. Zone focusing works best when you position yourself well and wait for action to enter your sharp zone. This patience often rewards you with more authentic, unguarded moments.
Your 30-Day Zone Focus Challenge
Week 1: Master one setup—35mm lens, f/8, 10-foot focus. Use only this configuration for all street photography. Learn its capabilities and limitations intimately.
Week 2: Experiment with different apertures using the same focus distance. Understand how f/5.6, f/8, and f/11 change your sharp zone with identical focus points.
Week 3: Try different focus distances with f/8. Practice 6-foot, 10-foot, and hyperfocal focusing to understand which works best for different shooting situations.
Week 4: Combine everything into dynamic zone focusing. Adjust settings as conditions change, building the intuitive understanding that makes zone focusing truly powerful.
Document your progress by noting which combinations work best for your style and typical shooting environments. This personal data becomes invaluable for future street photography sessions.
The Zone Focus Advantage
After mastering zone focusing, you'll never again miss shots due to autofocus delays. Your camera becomes an extension of your vision rather than a technical barrier between you and your subject. The confidence this brings transforms your entire approach to street photography.
More importantly, zone focusing connects you to photography's heritage. You're using the same techniques as the masters, understanding light and depth in ways that modern automation often obscures. This deeper technical knowledge improves all your photography, not just zone-focused work.
Zone focusing also makes you a more thoughtful photographer. The constraints force careful consideration of composition and positioning. Instead of relying on technology to solve problems, you develop the visual and technical skills that define truly accomplished photographers.
The streets move fast, but with zone focusing, you'll be ready. Sharp, decisive, and confident—just like the masters who built this beautiful medium we call street photography.
---
Master zone focusing and never miss another decisive moment. Share your zone focus successes with the community at InTheStreets and inspire other photographers to embrace this timeless technique.
*Featured image: "Woman adjusting DSLR camera outdoors" by JESHOOTS.com via Pexels*